How to create a Page builder with Rails
Don’t get too excited. Yes I will be going through the steps I took to build a Page builder, but it will not have all the bells and whistles. I am sure there are better and more elaborate ways of accomplishing this, but hey, it works.
I have been wanting to create this for a while, but did not know how to accomplish it, and so as all good developers do I “googled” 😃 I was not able to find much, but was able to piece together the idea. Here is what I came up with.
Let’s start
I am assuming that you are familiar with Rails and have your workstation all setup to create a Rails app.
In the terminal enter:
mkdir page_builder
cd page_builer
rails new . --database=postgresql
What we did here is create a new directory called “page_builder” and then changed into the new directory. Next we created a new Rails app, but we will be using Postgres as our database instead of sqlite later. The reason is that we will be using JSON to store information.
Test that the app was created successfully. In the terminal run:
rails db:create
Since we are using Postgres we need to create the database first.
Next start the rails app.
rails s
Open the browser and navigate to http://localhost:3000/ and you should see the Yay! page.

Create resources
First we will scaffold Pages, run the following command:
rails generate scaffold page name:string
Page is where all the page elements will be added to.
Next we will scaffold Elements, run the following command:
rails generate scaffold element name:string element_type:string
Element is mainly used to reference the partials (blueprint) that the page element will use. While I didn’t do it, you could use the Element to store default properties and their values. This is something I may implement later if I use this in a “real world” case.
Lastly, we will scaffold PageElements, run the following command:
rails generate scaffold page_element page:belongs_to element:belongs_to properties:jsonb
PageElement will store the properties of the element that will show up on the Page. This is the last resource, but before run the db:migrate we need to make change to the PageElement migration file. Open the db/migrate/*
class CreatePageElements < ActiveRecord::Migration[6.1]
  def change
    create_table :page_elements do |t|
      ...
      t.jsonb :properties, null: false, default: '{}'
      ...
    end
  end
end
Add , null: false, default: '{}' to the t.jsonb line. This will make sure it has a value.
We are done with the migration, and create the tables by running:
rails db:migrate
We need to update the Page and Element models to complete the one-to-many relationship of the PageElement. Open models/page.rb and adding the following:
has_many :page_elements, dependent: :destroy
Open models/element.rb and adding the following:
has_many :page_elements, dependent: :nullify
Static Page
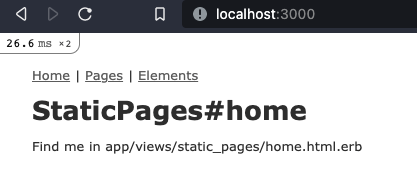
Before going any futher we will set up a home page and navigations. This is optional, but it helps when we are trying to move around the app in the browser. This time run:
rails generate controller StaticPages home
This will create the controller, view, and add the route for static pages and a home action.
We need to update the routes file to add a root path. In the config/routes.rb make the following change.
get 'static_pages/home # <- Delete this line
root 'static_pages#home # <- Add this link
Now if you start the rails app it will go to the default created home.html.erb page.
Next will create the navigation. Under the views add a folder called shared and then create a partial call _navigation.html.erb.
Open the views/shared/_navigation.html.erb file and add the following:
<nav>
  <%= link_to 'Home', root_path %> |
  <%= link_to 'Pages', pages_path %> |
  <%= link_to 'Elements', elements_path %>
</nav>
Next open views/layouts/application.html.erb file and add the navigation partial before the yield.
<body>
  <%= render 'shared/navigation' %>
  <%= yield %>
</body>
Now the navigation is on every page.
Elements
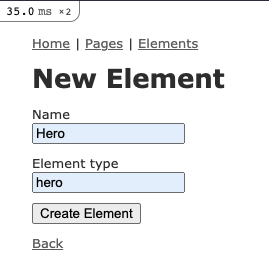
Let’s create our first element. For this article I am only going through how to create and use a “Hero” on a page. Any other element you create will take pretty much the same steps.
Go to your Element new page and add a “Hero”.
Pages
Create a new page that we use for the rest of this article.
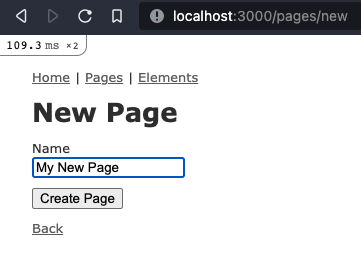
This will take you to the newly create page.
PageElements
Now that we have that in place it is time to start adding elements to our page. So the idea is to have a list of Elements that will show up on the Pages edit page. What you will see in some page builder is a fly out blade or a column with buttons or tiles that you can drag and drop onto the page. Ours will not be that sophisticated. We will just list the Element as links and then when you will click on the link it will append the element to the page.
To start out lets make a change to the routes.rb page. I want the PageElements to be a nested resource of Page. Open config/routes.rb and move resources :page_elements inside a resources :pages block.
Rails.application.routes.draw do
  ...
  resources :pages do
    resources :page_elements
  end
  ...
end
Next we need to be able to list the available Elements on the Pages edit page file. Open the controllers/pages_controller.rb and update the edit to get all available Elements.
  def edit
    @elements = Element.all
  end
Next we will open the views/pages/edit.html.erb. Below the edit form add the following:
<% @elements.each do |el| %>
  <%= link_to el.name, new_page_page_element_path(@page, element_type: el.element_type), remote: true %>
<% end %>
<br />
This will create a link for each available element and then add a element_type param, which will be used later. Also if you notice the remote: true that is because we what it to make an Ajax call and respond with a JavaScript file so there will be no page refresh. If you go to the edit page of our newly created Page you will see the “Hero” link. If you click on it nothing will happen and that is be of the remote: true is looking for a .js file in the views and we do not have it set up yet.
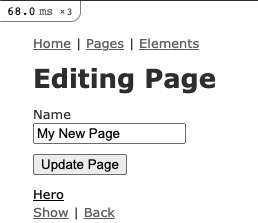
When you click link it is will make an Ajax request to the PageElements controller new action. We need to make some changes to that file. Open controllers/page_elements_controller.rb. Update the new action and add some before_action by adding the following lines:
class PageElementsController < ApplicationController
  before_action :set_page
  before_action :set_element, only: %i[ new create edit update ]
  ...
  def new
    @page_element = @page.page_elements.new
  end
  ...
  private
    # Use callbacks to share common setup or constraints between actions.
    def set_page
      @page = Page.find(params[:page_id])
    end

    def set_element
      @element = Element.find_by(element_type: params[:element_type])
    end
  ...
end
One more change to the page_elements_controller.rb will be need to be made to address working with the jsonb properties column. We will make an update to the page_element_params. Similar working with nested attributes we will need to list the allowed params within the properties column. Update with the following line:
  private
    ...
    def page_element_params
      params.require(:page_element).permit(:element_id,
                                            properties: [
                                              :hero_h1,
                                              :hero_subtitle,
                                              :background_color,
                                              :text_color,
                                              :padding_top,
                                              :padding_bottom,
                                              :padding_left,
                                              :padding_right,
                                              :cta_url
                                            ])
    end
The list of permitted properties are just for the “Hero” 🥴. This will quickly become a mess so I am looking for a better solution on how to handle this. My first thought is moving this to a Concern where I pass in the element_type as a parameter and then return all the properties for the element. We can work with this for now.
Now that is in place we can work on having a “Hero” form appear on the page. First add a folder under the views/page_elements/ called elements. This will hold the partials for the elements. Under the new elements folder create a partial called _hero_form.html.erb, and add the following:
<%= form_with(model: [page, page_element]) do |form| %>
  <% if page_element.errors.any? %>
    <div id="error_explanation">
      <h2><%= pluralize(page_element.errors.count, "error") %> prohibited this page_element from being saved:</h2>

      <ul>
        <% page_element.errors.each do |error| %>
          <li><%= error.full_message %></li>
        <% end %>
      </ul>
    </div>
  <% end %>
  <%= hidden_field_tag :element_type, @element.element_type %>

  <div class="field">
    <%= label_tag 'page_element[properties][hero_h1]', 'H1' %>
    <%= text_field_tag 'page_element[properties][hero_h1]', page_element['properties']['hero_h1'] %>
  </div>

  <div class="field">
    <%= label_tag 'page_element[properties][hero_subtitle]', 'Subtitle' %>
    <%= text_field_tag 'page_element[properties][hero_subtitle]', page_element['properties']['hero_subtitle'] %>
  </div>

  <div class="field">
    <%= label_tag 'page_element[properties][background_color]', 'Background Color' %>
    <input type="color" name='page_element[properties][background_color]' id='page_element_properties_background_color' value="<%= page_element['properties']['background_color'].present? ? page_element['properties']['background_color'] : '#ffffff' %>" />
  </div>

  <div class="field">
    <%= label_tag 'page_element[properties][text_color]', 'Text Color' %>
    <input type="color" name='page_element[properties][text_color]' id='page_element_properties_text_color' value="<%= page_element['properties']['text_color'] %>" />
  </div>

  <div class="field">
    <%= label_tag 'page_element[properties][padding_top]', 'Padding top (px)' %>
    <%= text_field_tag 'page_element[properties][padding_top]', page_element['properties']['padding_top'] %>
  </div>

  <div class="field">
    <%= label_tag 'page_element[properties][padding_bottom]', 'Padding bottom (px)' %>
    <%= text_field_tag 'page_element[properties][padding_bottom]', page_element['properties']['padding_bottom'] %>
  </div>

  <div class="field">
    <%= label_tag 'page_element[properties][padding_left]', 'Padding left (px)' %>
    <%= text_field_tag 'page_element[properties][padding_left]', page_element['properties']['padding_left'] %>
  </div>

  <div class="field">
    <%= label_tag 'page_element[properties][padding_right]', 'Padding right (px)' %>
    <%= text_field_tag 'page_element[properties][padding_right]', page_element['properties']['padding_right'] %>
  </div>

  <div class="field">
    <%= label_tag 'page_element[properties][cta_url]', 'Button URL' %>
    <%= text_field_tag 'page_element[properties][cta_url]', page_element['properties']['cta_url'] %>
  </div>

  <div class="actions">
    <%= form.submit %>
  </div>
<% end %>
There is alot going on here, but point out some times. Since we are nesting the page_element you will have to change the first line so it will have the correct action path the form_with(model: [page, page_element]) will create the path /pages/:id/page_elements. For the color and the background_color field I have set some default values is none are given. This form will be used to edit the element so it may have values. I will need to update this form because I think that I can use the field_for for the properties fields, but at the moment this will work.
Next create a new.js.erb file under views/page_elements/. Since we are making an Ajax request when we click the “Hero” link the controller receive the request as JS and respond with a .js.erb file. Open the views/page_elements/new.js.erb file and add the following:
document.querySelector("#page-element-content").insertAdjacentHTML("beforeend", "<%= j render "page_elements/elements/#{@element.element_type}_edit", page_element: @page_element %>")

document.querySelector("#element-properties-form").innerHTML = ("<%= j render "page_elements/elements/#{@element.element_type}_form", page: @page, page_element: @page_element %>")
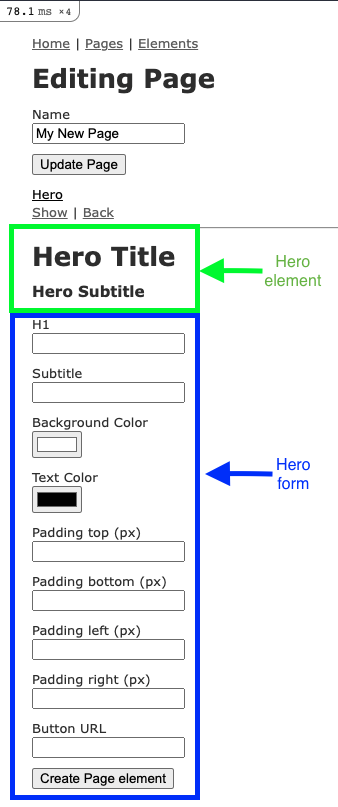
We are using JavaScript to locate targets in the Page edit.html.erb page to insert/append partials. The first being the representation of the Element and the send is for the Page Elements form so we can edit the properties.
We now need to add the targets to the Page edit.html.erb page. Open the views/pages/edit.html.erb and add the following to the bottom of the file:
...
<hr />
<div id="page-element-content">
  <% @page.page_elements.each do |el| %>
    <%= render "page_elements/elements/#{el.element.element_type}_edit", page_element: el %>
  <% end %>
</div>
<div id="element-properties-form"></div>
Next create a partial _hero_edit.html file under views/page_elements/elements/. Open the partial and add the following:
<div id=<%= "hero-#{dom_id(page_element)}" %> style="<%= hero(page_element.properties) %>">
  <h1><%= page_element.properties["hero_h1"].present? ? page_element.properties["hero_h1"] : "Hero Title" %></h1>
  <h3><%= page_element.properties["hero_subtitle"].present? ? page_element.properties["hero_subtitle"] : "Hero Subtitle" %></h3>
  <% if page_element.properties["cta_url"] %>
    <div>
      <a href="<%= page_element.properties["cta_url"] %>" style="padding: 4px;background-color:#c3c3c3;color:#000000;text-decoration:none;border-radius:2px;">Go to</a>
    </div>
  <% end %>
  <% if page_element.persisted? %>
    <%= link_to 'Edit', edit_page_page_element_path(page_element.page, page_element, element_type: 'hero'), remote: true %>
    <%= link_to 'Delete', page_page_element_path(page_element.page, page_element), method: :delete, data: { confirm: "Are you sure?" } %>
  <% end %>
</div>
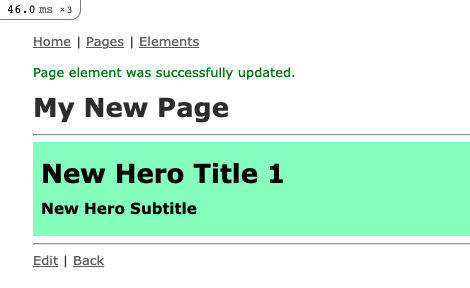
The above partial will be the element that will show on the edit Page. We will create a different partial that will be used on the Page show page. One thing to note is on the first line you will see style="<%= hero(page_element.properties) %>". I had to create helper method called “hero” to take in the properties and map them to the proper CSS names and add the values. This helper returns a string of the styles and values. Example: "background-color:#9effc3;color:#000000;padding-top:px;padding-bottom:px;padding-left:px;padding-right:px;" When you create a page element it will show up with the styles you have submitted.
We will need to create this helper method. Because we generated scaffold it will have created a helper file for us. I chose the element_helper.rb file to add the following method. You can find it under the helpers folder.
def hero(properties)
  styles = ""
  styles << "background-color:" << properties["background_color"].to_s << ";"
  styles << "color:" << properties["text_color"].to_s << ";"
  styles << "padding-top:" << properties["padding_top"].to_s << "px;"
  styles << "padding-bottom:" << properties["padding_bottom"].to_s << "px;"
  styles << "padding-left:" << properties["padding_left"].to_s << "px;"
  styles << "padding-right:" << properties["padding_right"].to_s << "px;"
  styles
end
You will need to create such method for any available Elements that you create.
To create, update and delete a “Hero” we need to update the page_elements_controller. Update the create action.
def create
  @page_element = @page.page_elements.new(page_element_params)
  @page_element.element_id = @element.id

  respond_to do |format|
    if @page_element.save
      format.html { redirect_to edit_page_path(@page), notice: "Page element was successfully created." }
    else
      format.html { redirect_to edit_page_path(@page), status: :unprocessable_entity }
    end
  end
end
Two more change needs to be made the update and destroy action. Change the redirect_to path.
def update
  respond_to do |format|
    if @page_element.update(page_element_params)
      format.html { redirect_to edit_page_path(@page), notice: "Page element was successfully updated." }
      ...
    end
  end
end

def destroy
  ...
  respond_to do |format|
    format.html { redirect_to edit_page_path(@page), notice: "Page element was successfully destroyed." }
    ...
  end
end
When you click the “Hero” link the hero form with the hero element should appear.
We will want to show the elements on the Page show page. Open the views/pages/show.html.erb. Add the follwing below the page name:
<hr />
<div id="page-element-content">
  <% @page.page_elements.each do |el| %>
    <%= render "page_elements/elements/#{el.element.element_type}", page_element: el %>
  <% end %>

<hr />
We are rendering a partial for each page element created. We will need to create this partial. Open views/page_elements/elements/ and add a _hero.html.erb file. Open the _hero.html.erb file and add the following:
<div id=<%= "hero-#{dom_id(page_element)}" %> style="<%= hero(page_element.properties) %>">
  <h1><%= page_element.properties["hero_h1"].present? ? page_element.properties["hero_h1"] : "Hero Title" %></h1>
  <h3><%= page_element.properties["hero_subtitle"].present? ? page_element.properties["hero_subtitle"] : "Hero Subtitle" %></h3>
</div>
Now if you create a new Page element and go the show page of the Page then you will see the styled element.
To close the circle you can update the Page element by going the edit page of the Page and then click the edit link below the Page element. This will open the edit form below the elements.
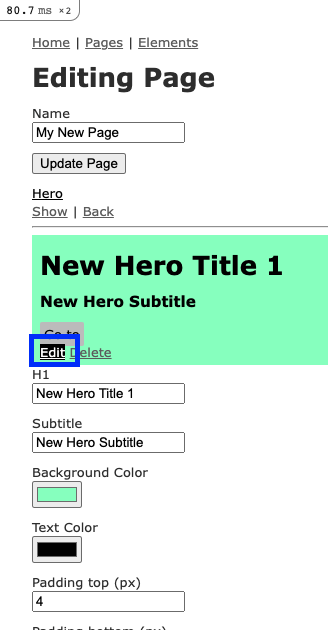
To get this to appear we need to add a edit.js.erb to the /views/pages/. Add the following to the file:
document.querySelector("#element-properties-form").innerHTML = ("<%= j render "page_elements/elements/#{@element.element_type}_form", page: @page, page_element: @page_element %>")
This is similar to the new.js.erb as it will target the id element-properties-form and insert the form.
Conclusion
This was a fun project. There is a ton of room for improvement. My way of working is I try to make it work and then I make it “pretty”. So I got it to work, and next step is to interate on it to make it better. I hope you enjoyed it and find something useful.